Hiya, guys!
It's been almost a week since Your Face Sounds Familiar declared its grand winner; and while my bet Sam Concepcion only placed third in the competition with his Justin Bieber impersonation, I'm still reeling from his Mandy Moore impersonation to this day.
And because I'm so inspired, I really wanted to copy Mandy's look from the music video of 'Cry' when an opportunity comes. I kept looking at her face in the video, took screenshots of it and even tried to find a tutorial over YouTube (but to no avail) until I finally got an idea of sorts on how I'm gonna do it.
That opportunity came last Monday during our school Christmas party.
Click 'Read More' to get the details of the look.
Showing posts with label in2it. Show all posts
Friday, December 18, 2015
Friday, December 11, 2015
FOTD: Red Lips, Red Shirt
I can't count how many times I have worn red lips on special occasions -- be it costume parties or Christmas parties. But rarely do I wear it on an ordinary day, until last Tuesday.
I think my spirits were at its peak that time, that's why I feel like wearing a red lip. Never mind that I was also wearing a red shirt that same day. Haha!
The products that I used coming up when you click 'Read More.'
| Never mind my still-wet hair -- I don't blow-dry my hair, just air-dry. |
The products that I used coming up when you click 'Read More.'
Wednesday, November 18, 2015
[UPDATED] What's In My Kikay Kit -- Part 1
Hiya, guys!
Finally blogging again after many months of busy-ness and a brief slump (see previous post). I kinda miss blogging about all things kikay so might as well bring it back, not just for you guys, but for me as well.
I was going through my blog posts and I found that it was almost three years since my last 'what's in my kikay kit' post. (see post one, post two and post three) A lot of things inside my bag essentials has changed since then, so why not make a post (or two? haha) about it?
First of all, I got myself another bag organizer a few years ago. Unlike the pink one from three years ago, this one is blue with yellow zippers and the construction of this one is much softer. As with my previous organizer, it not only houses my kikay essentials but also other items like card organizer, medicine kit, a mini fan and some other stuff.
Okay, without further adieu, let's go through the kikay things in my kikay kit:
BTW: This will be a pretty long post so like my previous 'what's in my kikay kit' post, I'll be doing this in installments. Also, I've done reviews on some of the items listed here, and I've provided the links here on this post. If you want me to do a full-on review on the items here that were not previously reviewed, let me know by leaving a comment at the comments section.
Finally blogging again after many months of busy-ness and a brief slump (see previous post). I kinda miss blogging about all things kikay so might as well bring it back, not just for you guys, but for me as well.
I was going through my blog posts and I found that it was almost three years since my last 'what's in my kikay kit' post. (see post one, post two and post three) A lot of things inside my bag essentials has changed since then, so why not make a post (or two? haha) about it?
First of all, I got myself another bag organizer a few years ago. Unlike the pink one from three years ago, this one is blue with yellow zippers and the construction of this one is much softer. As with my previous organizer, it not only houses my kikay essentials but also other items like card organizer, medicine kit, a mini fan and some other stuff.
Okay, without further adieu, let's go through the kikay things in my kikay kit:
BTW: This will be a pretty long post so like my previous 'what's in my kikay kit' post, I'll be doing this in installments. Also, I've done reviews on some of the items listed here, and I've provided the links here on this post. If you want me to do a full-on review on the items here that were not previously reviewed, let me know by leaving a comment at the comments section.
Tuesday, February 11, 2014
My 10-Minute Work+School Makeup Look
Hiya guys!
I'm here for another makeup post. Not that I'm gonna turn my blog into a beauty blog, but then it's one of my personal passions besides writing. Another thing, I really miss making posts like these so bear with me for a while. Or maybe I should include a beauty section in my blog?
Anyways, I mentioned in my last post that I'm gonna feature my everyday work+school look. This is the kind of makeup that looks polished, work and school appropriate even, yet takes less time to do. That's why this is perfect when you want to 'dress up your face a bit' but you're in a hurry to get to work or school (in my case both!) on time.
A lot of makeup blogs suggest that when doing a quick makeup look (those 5-, 10- and 15-minute faces), focus on just one or two features that you want to highlight or conceal, and then just touch up on the others. In my case, I usually focus on my skin and my eyes.
You see, I have oily skin with dark acne marks and shadowy under-eye areas. I'll be the first one to admit that I look 'harassed' when I'm bare-faced (see the before photo in my Etude House BB cream review), and that I really need to step up my skin care routine, besides the usual cleanse-tone-moisturize ritual. Care to suggest any skin care product for me to try?
As for my eyes... Well, it's my personal choice to focus on my eyes as well. While the lips just need a simple swipe of lip makeup, eye makeup needs a bit more skill to perfect. I've been practicing on my eye makeup skills for quite some time, and so far I've found that perfect work-appropriate eye look.
Here's what I used for this look:
1. Etude House Precious Minerals BB Cream Bright Fit in Sand Beige
2. CoverGirl AquaSmoothers Compact Foundation in Soft Honey
3. Natasha Beauty Perfect Wear Dual Powder Foundation
4. In2It Waterproof Eyebrow Color
5. Natasha Beauty GlamFix Eyeliner in Chocofix
6. Natasha Beauty Secondskin Blush in Coral Cruise
7. Natasha Beauty Color Spalipstick in Cocohaven
Reminder: Always moisturize before putting on makeup. Here I used Olay Natural White Light cream.
So let's begin!
Step 1. Apply your base of choice -- I use Etude House Precious Minerals BB Cream as it provides light to medium coverage and sun protection all at the same time. I usually use my clean fingers when spreading the BB cream, but you can also use a foundation brush or stippling brush.
Step 2. If you've got unsightly discolorations like I do, apply concealer on those spots. I used the CoverGirl AquaSmoothers Compact Foundation as concealer and applied them on my under-eye circles and on the dark spots on my cheeks. Again, I used my fingers but you can also use a concealer brush (I sometimes do that).
Step 3. Set the BB cream and concealer with powder. Here I used a powder foundation 'cause I want a little more coverage but if you just want to set your makeup and/or ward off oil, you can use a powder that's made to blot off oil.
Some makeup artists would advice setting your makeup with powder towards the end of your makeup routine. But for this look, since I'm not using as much liquid or cream makeup besides the BB cream and concealer, I like setting it up with powder before doing my eyes, lips and cheeks. However, if I'm going to use the likes of eyeshadow primer, cheek tints, gel or liquid eyeliners, I might be doing this step last. Then again, it's your call whether to set your makeup last or otherwise.
Step 4. Groom the brows by first brushing the brows so that the hairs follow your brow shape. Then fill it out using a brow color. Your choice as to what kind you will use -- pencil, pen, powder. I prefer powder, so I used In2It Waterproof Eyebrow Color in its lightest color.
Step 5. I use only one kind of eye makeup -- it's a time saver trick whenever you wish to focus on your eyes. Okay, fine I used two if you count the brow powder. Anyway, here I used a brown eyeliner because I'm going for a professional look, and then I lined it all over my upper and lower lash lines. Again, your choice as to what kind of eye makeup to use -- powder eyeshadow, cream shadow, mascara, false lashes...
Step 6. A quick swipe of blush and lip color and you're done!
And so here is my simple everyday professional look that only takes 10 minutes to do. Try this look the next time you need to look polished at work or in school.
Please bear with my product photos as it does not appear in its actual colors -- I'm still on the learning process of editing photos as of the moment.. *wink wink*
I'm here for another makeup post. Not that I'm gonna turn my blog into a beauty blog, but then it's one of my personal passions besides writing. Another thing, I really miss making posts like these so bear with me for a while. Or maybe I should include a beauty section in my blog?
Anyways, I mentioned in my last post that I'm gonna feature my everyday work+school look. This is the kind of makeup that looks polished, work and school appropriate even, yet takes less time to do. That's why this is perfect when you want to 'dress up your face a bit' but you're in a hurry to get to work or school (in my case both!) on time.
A lot of makeup blogs suggest that when doing a quick makeup look (those 5-, 10- and 15-minute faces), focus on just one or two features that you want to highlight or conceal, and then just touch up on the others. In my case, I usually focus on my skin and my eyes.
You see, I have oily skin with dark acne marks and shadowy under-eye areas. I'll be the first one to admit that I look 'harassed' when I'm bare-faced (see the before photo in my Etude House BB cream review), and that I really need to step up my skin care routine, besides the usual cleanse-tone-moisturize ritual. Care to suggest any skin care product for me to try?
As for my eyes... Well, it's my personal choice to focus on my eyes as well. While the lips just need a simple swipe of lip makeup, eye makeup needs a bit more skill to perfect. I've been practicing on my eye makeup skills for quite some time, and so far I've found that perfect work-appropriate eye look.
Here's what I used for this look:
1. Etude House Precious Minerals BB Cream Bright Fit in Sand Beige
2. CoverGirl AquaSmoothers Compact Foundation in Soft Honey
3. Natasha Beauty Perfect Wear Dual Powder Foundation
4. In2It Waterproof Eyebrow Color
5. Natasha Beauty GlamFix Eyeliner in Chocofix
6. Natasha Beauty Secondskin Blush in Coral Cruise
7. Natasha Beauty Color Spalipstick in Cocohaven
Reminder: Always moisturize before putting on makeup. Here I used Olay Natural White Light cream.
So let's begin!
Step 1. Apply your base of choice -- I use Etude House Precious Minerals BB Cream as it provides light to medium coverage and sun protection all at the same time. I usually use my clean fingers when spreading the BB cream, but you can also use a foundation brush or stippling brush.
![]() |
| I'm almost hitting pan on my favorite cream foundation. Maybe it's time to get a new one.. |
Step 3. Set the BB cream and concealer with powder. Here I used a powder foundation 'cause I want a little more coverage but if you just want to set your makeup and/or ward off oil, you can use a powder that's made to blot off oil.
Some makeup artists would advice setting your makeup with powder towards the end of your makeup routine. But for this look, since I'm not using as much liquid or cream makeup besides the BB cream and concealer, I like setting it up with powder before doing my eyes, lips and cheeks. However, if I'm going to use the likes of eyeshadow primer, cheek tints, gel or liquid eyeliners, I might be doing this step last. Then again, it's your call whether to set your makeup last or otherwise.
Step 4. Groom the brows by first brushing the brows so that the hairs follow your brow shape. Then fill it out using a brow color. Your choice as to what kind you will use -- pencil, pen, powder. I prefer powder, so I used In2It Waterproof Eyebrow Color in its lightest color.
Step 5. I use only one kind of eye makeup -- it's a time saver trick whenever you wish to focus on your eyes. Okay, fine I used two if you count the brow powder. Anyway, here I used a brown eyeliner because I'm going for a professional look, and then I lined it all over my upper and lower lash lines. Again, your choice as to what kind of eye makeup to use -- powder eyeshadow, cream shadow, mascara, false lashes...
Step 6. A quick swipe of blush and lip color and you're done!
And so here is my simple everyday professional look that only takes 10 minutes to do. Try this look the next time you need to look polished at work or in school.
Please bear with my product photos as it does not appear in its actual colors -- I'm still on the learning process of editing photos as of the moment.. *wink wink*
Labels:
beauty,
cover girl,
etude house,
in2it,
makeup,
natasha beauty
Friday, December 28, 2012
Jesselle the Makeup Junkie: The Brush Kit (and a New Addition to My Arsenal)
What's makeup without the proper brushes?
Sure, there are some items that you can apply with your hands or fingers, but the precision that makeup brushes offer is beyond compare.
But because I'm not exactly a professional when it comes with makeup application, and I don't have that much time to rummage around 24 pieces of brushes just to get the job done, I settled with a seven-piece set, with the addition of one.
The Fanny Serrano brush kit comes with seven brushes:
A. Face Brush - for buffing all over the face; also for applying face powder.
B. Blush Brush - for blushes, obviously; also for bronzers.
C. Eyeshadow Brush - for applying the base color on the eyes.
D. Eye Blending Brush - for blurring out harsh lines when applying two or more eye colors; most useful when doing the smokey eye.
E. Angled Brush - for precision application of eye color (I personally use this brush for applying the darkest color at the area between the lash line to the crease)
F. Lip Brush - for lip colors; most useful when applying red lip color (It is always advisable to use a brush when applying red lip color; except for those times when you want just a hint of red on your lips -- put a bit with your pinkie finger, and then finish it off with lip balm or clear gloss)
G. Mascara Spoolie - for separating lashes clumped with mascara and grooming eyebrows.
I encased my two larger brushes in a net-like brush protector to retain its shape. I bought these protectors at Suesh kiosk in Trinoma -- it comes in a set of ten, but because it's too long for my otherwise small brushes, I cut them in half so that it fits.
When I first bought the set, I was already content with its contents -- for a makeup novice like me, it has everything I need. But as I learn new techniques, I felt the need for more brushes. And I found one of them at SM Department Store...
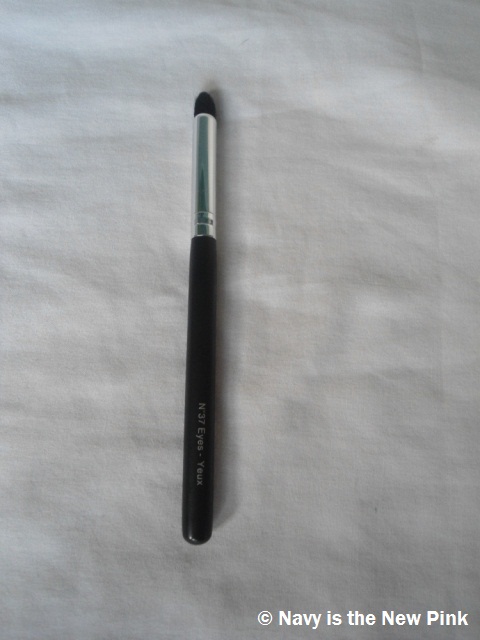
This is the bullet brush from Marionnaud. Great for applying eye contour color (which I'm still trying to perfect to this day), most useful when doing the smokey eye.
I still want to complete my 'advanced' makeup brush kit, and the following brushes will make it complete: foundation brush, concealer brush, hard-bristle brow brush.
And for the latest addition in my arsenal...
Here it is: In2It Waterproof Eyebrow Powder. I received it as a gift during our office kris kringle. I originally wrote 'ELF Brow Kit' in the wishlist, but my monita gave me this. How does this fare for my standards? Watch out for it... :)
Subscribe to:
Posts (Atom)