Showing posts with label etude house. Show all posts

Monday, December 21, 2015

HOW TO: The Pencil Case Makeup Kit

Hiya, guys!

By now you've seen my most recent makeup kit. I'm fully aware that it's an obscene amount of makeup for someone like me who probably uses around five or six makeup items at any given time.


What's a girl to do? Downsize it.

But how low can you get? Or should I say how small should I get?

The answer when you click 'Read More.'

Friday, December 18, 2015

FOTD: The Moment I Saw You Cry

Hiya, guys!

It's been almost a week since Your Face Sounds Familiar declared its grand winner; and while my bet Sam Concepcion only placed third in the competition with his Justin Bieber impersonation, I'm still reeling from his Mandy Moore impersonation to this day.


And because I'm so inspired, I really wanted to copy Mandy's look from the music video of 'Cry' when an opportunity comes. I kept looking at her face in the video, took screenshots of it and even tried to find a tutorial over YouTube (but to no avail) until I finally got an idea of sorts on how I'm gonna do it.

That opportunity came last Monday during our school Christmas party.

Click 'Read More' to get the details of the look.

Thursday, December 17, 2015

[KOJIC ACID SERIES] My Kojic Acid Skin Care Routine

Hiya, guys!

In my previous post I promised that I will be sharing to you the entire lineup of skin care products that I use alongside Kojie San Lightening Soap. So here it goes...

Day

Cleanse

Of course the first step of this routine is the star product -- the Kojie San Lightening Soap. Like I mentioned in the previous post, I usually wash my face, lather the soap into foam, massage it onto my face and leave it for two minutes or more. Then rinse.


Sheet Mask/Essence (sort-of)

I decided to skip toner this time because the toner that I currently have (Flawless Pimple Clear Astringent) is drying, and I don't want to dry up my skin further. Instead, I'd like to boost up the moisture on my face. So continue with my skin care routine with a sheet mask or a watery essence of sorts, using the excess liquid of whatever sheet mask I previously used -- in this case the Tony Moly Pureness 100 Hyaluronic Acid Mask Sheet.


After washing my face, i proceed with the sheet mask. After using the sheet mask, I transfer the excess liquid to a dropper bottle. The following day, I use the liquid in place of the sheet mask in the routine. Once the liquid is all used up, that's the time when I use another sheet mask. You know the drill.

The magic elixir! (hehe)
The rest of my daytime routine, the night routine and the occasional steps when you click 'Read More.'

Friday, December 11, 2015

FOTD: Red Lips, Red Shirt

I can't count how many times I have worn red lips on special occasions -- be it costume parties or Christmas parties. But rarely do I wear it on an ordinary day, until last Tuesday.

Never mind my still-wet hair -- I don't blow-dry my hair, just air-dry.
I think my spirits were at its peak that time, that's why I feel like wearing a red lip. Never mind that I was also wearing a red shirt that same day. Haha!

The products that I used coming up when you click 'Read More.'

Wednesday, November 18, 2015

[UPDATED] What's In My Kikay Kit -- Part 1

Hiya, guys!

Finally blogging again after many months of busy-ness and a brief slump (see previous post). I kinda miss blogging about all things kikay so might as well bring it back, not just for you guys, but for me as well.

I was going through my blog posts and I found that it was almost three years since my last 'what's in my kikay kit' post. (see post one, post two and post three) A lot of things inside my bag essentials has changed since then, so why not make a post (or two? haha) about it?


First of all, I got myself another bag organizer a few years ago. Unlike the pink one from three years ago, this one is blue with yellow zippers and the construction of this one is much softer. As with my previous organizer, it not only houses my kikay essentials but also other items like card organizer, medicine kit, a mini fan and some other stuff.

Okay, without further adieu, let's go through the kikay things in my kikay kit:

BTW: This will be a pretty long post so like my previous 'what's in my kikay kit' post, I'll be doing this in installments. Also, I've done reviews on some of the items listed here, and I've provided the links here on this post. If you want me to do a full-on review on the items here that were not previously reviewed, let me know by leaving a comment at the comments section.

Wednesday, February 19, 2014

My Skin Care Routine + Quick Review

Hiya guys!

Today I'll be showing to you my skin care routine, and I will do a quick review of each of them.

As I have mentioned in my blog quite a few times, I have oily skin. I also get breakouts -- blackheads, whiteheads, pimples -- you name it, especially when I'm stressed (hello exams week!). That is why one of the things that I look for in skin products is its ability to keep oil at bay and prevent (or treat) pimples.

That being said, here are the products that I use for my usual skincare routine.

DAY


1. Pond's Clear Solutions Facial Wash

Of all the drugstore facial washes that I have tried, this wash has worked well for me so far. It leaves my skin squeaky clean and refreshed after washing.


2. Olay Natural White Light face cream

I like my day cream light and non-greasy, much like putting on water condensed in a cream. That is why I like this day cream -- it is light and non-greasy, and it does not interfere with my makeup application. But then I still think there is a better day moisturizer out there that suits the needs of my oily skin...


3. Etude House Precious Minerals BB Cream Bright Fit

Though it's technically makeup, I treat it as skincare because of its SPF30 properties. It's because sunblock is an essential skin care step, especially for me who go on long commutes nearly on a daily basis. Because of that, I usually go for products with an SPF factor of 30 or higher, thus this product.

My night routine and the latest addition to my arsenal when you read 'Read More'

Tuesday, February 11, 2014

My 10-Minute Work+School Makeup Look

Hiya guys!

I'm here for another makeup post. Not that I'm gonna turn my blog into a beauty blog, but then it's one of my personal passions besides writing. Another thing, I really miss making posts like these so bear with me for a while. Or maybe I should include a beauty section in my blog?


Anyways, I mentioned in my last post that I'm gonna feature my everyday work+school look. This is the kind of makeup that looks polished, work and school appropriate even, yet takes less time to do. That's why this is perfect when you want to 'dress up your face a bit' but you're in a hurry to get to work or school (in my case both!) on time.

A lot of makeup blogs suggest that when doing a quick makeup look (those 5-, 10- and 15-minute faces), focus on just one or two features that you want to highlight or conceal, and then just touch up on the others. In my case, I usually focus on my skin and my eyes.

You see, I have oily skin with dark acne marks and shadowy under-eye areas. I'll be the first one to admit that I look 'harassed' when I'm bare-faced (see the before photo in my Etude House BB cream review), and that I really need to step up my skin care routine, besides the usual cleanse-tone-moisturize ritual. Care to suggest any skin care product for me to try?

As for my eyes... Well, it's my personal choice to focus on my eyes as well. While the lips just need a simple swipe of lip makeup, eye makeup needs a bit more skill to perfect. I've been practicing on my eye makeup skills for quite some time, and so far I've found that perfect work-appropriate eye look.


Here's what I used for this look:

1. Etude House Precious Minerals BB Cream Bright Fit in Sand Beige
2. CoverGirl AquaSmoothers Compact Foundation in Soft Honey
3. Natasha Beauty Perfect Wear Dual Powder Foundation
4. In2It Waterproof Eyebrow Color
5. Natasha Beauty GlamFix Eyeliner in Chocofix
6. Natasha Beauty Secondskin Blush in Coral Cruise
7. Natasha Beauty Color Spalipstick in Cocohaven

Reminder: Always moisturize before putting on makeup. Here I used Olay Natural White Light cream.

So let's begin!


Step 1. Apply your base of choice -- I use Etude House Precious Minerals BB Cream as it provides light to medium coverage and sun protection all at the same time. I usually use my clean fingers when spreading the BB cream, but you can also use a foundation brush or stippling brush.

I'm almost hitting pan on my favorite cream foundation. Maybe it's time to get a new one..
Step 2. If you've got unsightly discolorations like I do, apply concealer on those spots. I used the CoverGirl AquaSmoothers Compact Foundation as concealer and applied them on my under-eye circles and on the dark spots on my cheeks. Again, I used my fingers but you can also use a concealer brush (I sometimes do that).


Step 3. Set the BB cream and concealer with powder. Here I used a powder foundation 'cause I want a little more coverage but if you just want to set your makeup and/or ward off oil, you can use a powder that's made to blot off oil.

Some makeup artists would advice setting your makeup with powder towards the end of your makeup routine. But for this look, since I'm not using as much liquid or cream makeup besides the BB cream and concealer, I like setting it up with powder before doing my eyes, lips and cheeks. However, if I'm going to use the likes of eyeshadow primer, cheek tints, gel or liquid eyeliners, I might be doing this step last. Then again, it's your call whether to set your makeup last or otherwise.


Step 4. Groom the brows by first brushing the brows so that the hairs follow your brow shape. Then fill it out using a brow color. Your choice as to what kind you will use -- pencil, pen, powder. I prefer powder, so I used In2It Waterproof Eyebrow Color in its lightest color.


Step 5. I use only one kind of eye makeup -- it's a time saver trick whenever you wish to focus on your eyes. Okay, fine I used two if you count the brow powder. Anyway, here I used a brown eyeliner because I'm going for a professional look, and then I lined it all over my upper and lower lash lines. Again, your choice as to what kind of eye makeup to use -- powder eyeshadow, cream shadow, mascara, false lashes...


Step 6. A quick swipe of blush and lip color and you're done!

And so here is my simple everyday professional look that only takes 10 minutes to do. Try this look the next time you need to look polished at work or in school.

Please bear with my product photos as it does not appear in its actual colors -- I'm still on the learning process of editing photos as of the moment.. *wink wink*

Friday, February 7, 2014

[REVIEW] Etude House Precious Minerals BB Cream Bright Fit

Hello everyone!

As you have read on my previous post, I just marked my official return on the blogosphere, as well as a few of the reasons why I was absent for quite some time. And now that I'm back, let's start with a few of the overdue posts -- those that I'm planning to write here in this blog, but was not able to do so because of so many things that caused my absence.

And we begin with a makeup post. It's been quite a while since I made one, and how I miss it...

So in here we have the Etude House Precious Minerals BB Cream Bright Fit in W15 - Sand Beige.


From Etude House:

"BB Cream formulated with Pearl Powder with an improved adhesive texture to promote moist, radiant looking skin while protecting against UV damage and wrinkles."

Backside of the bottle. I like the "Brightening: OK! Darkening: Zero!" in here.

A little FYI first: I had this with me since September last year, and I took these photos upon unboxing it. So this review will be based on many months of using this product.

This was not the first time that I used a BB cream from Etude House, or any other product from the Korean brand for that matter. I've previously used their Goodbye Pore Ever Primer Stick, and as I've mentioned in my review, I have already used their Dr. Oil Solution BB Lotion.


Like most BB creams, this baby is in a liquid formula which comes in a tube packaging with a pump. While you may not see what's inside the tube as it is opaque, you can 'feel' how much product is left as it becomes skinnier with time. Kinda like toothpaste, but with pump for easier product control.

straight from the pump...

spread out a bit...

blended well...
Consistency is a bit like moisturizer -- thick but not like Dairy Queen ice cream in that it does run a bit when turned upside down. As you can see in the swatches here, it appears opaque as it comes out of the pump and when spread out a bit. But when spread out further, it thins out to a sheer to medium coverage.

Etude House Precious Minerals BB Cream Bright Fit comes in four shades, Sand Beige being the darkest. And it does look dark against my skin, under natural light, when taken from the pump, but then it produces a white cast when spread a bit. Once blended out, it blended to my skin tone but with a bit of white cast still present due to the SPF content of the product.

from pump -- indoor light

from pump -- flash
spread a bit -- indoor light

spread a bit -- flash
blended out -- indoor light

blended out -- flash
Photos above are taken in indoor light and in flash.


Before photo, with Olay Natural White Light Day Cream, and my hair still wet

After photo (smiling mugshot, anyone?! hahaha!)

It improved my skin a lot, like it looked brighter than the before photo. As for the white cast... What white cast? It looked like a light lit from within! Haha! But then it did not significantly cover dark under-eyes (getting home late at night from law school is a bane!) and acne scars (facial alert!) as it only had sheer coverage. Maybe it will cover up a bit more if I put on another layer...

After photo, with CoverGirl AquaSmoothers Compact foundation as concealer and Natasha Beauty Perfect Finish Dual Powder Foundation

But then nothing that a good concealer and powder foundation can fix. Learned that tip from Martha of The Beauty Junkee.

In here is my usual work+school makeup, the simplest that I usually do. But this deserves another post so I'll reserve that for later.

I was not able to take a photo of myself upon getting home, so I'll explain what happened after seven hours. Staying power was good enough with the help of the powder foundation, though it oiled up after four hours, thus the need for blotting sheets and a oil-mattifying balm on the T-zone and other oily areas.

And it lasts me a long time -- I have this product with me for five months now, and it's still 3/4 full even while sharing this with my mother (she also loves this product so much that I might get another bottle for her own use).

Overall, Etude House Precious Minerals BB Cream Bright Fit is a pretty good base makeup for everyday use -- good buildable coverage without the heaviness of foundation, SPF30, that glow effect, a shade suitable for morenas like me, and last you a long time. So much to offer for a 60g tube of BB cream, isn't it? :)

Wednesday, December 26, 2012

Jesselle the Makeup Junkie: On Kikay Kit #2


As I have mentioned in the first part of this series, my kikay kit #2 mostly contain small items. If I were to downsize my stuff to fit into a smaller bag, I'm less likely to include this kikay kit into it.


However, variety is the spice of life, so I like keeping this small case with me whenever I bring a bigger bag. After all, I never knew when I want to sport a colored eyeliner or a red lip.

Eye Preps

I usually play safe with my eyes -- they sometimes take up much effort to do anything daring with it, unlike with lips where all you need is a swipe of a punchy lip color to be daring (read: Nicki Minaj pink).

However, I knew the importance of prepping in makeup, especially the eyes. Because I tend to wear my eye makeup the entire day, I have to make sure it stays that way for a long time. Thus the need for these items:


Ever wonder why at times your concealer looks darker than your skin, especially during the colder -ber months? That's because during these months, you lose a bit of your summer tan, if not most of it. That is why a web article (can't remember exactly where I read that so I could not provide the link) recommend having two different shades of concealer on hand: one that has a darker shade which you can use during warmer months, and one that has a lighter shade which is to be used during cooler months.

A lighter shade of concealer is also perfect for covering up under-eye circles (which is a perennial fixture in my face recently). Especially if it has a peach-pink or yellow undertone (according to Bobbi Brown), it cancels out the bluish undertone of dark circles. Just don't get too light, though, or you might end up with raccoon eyes.

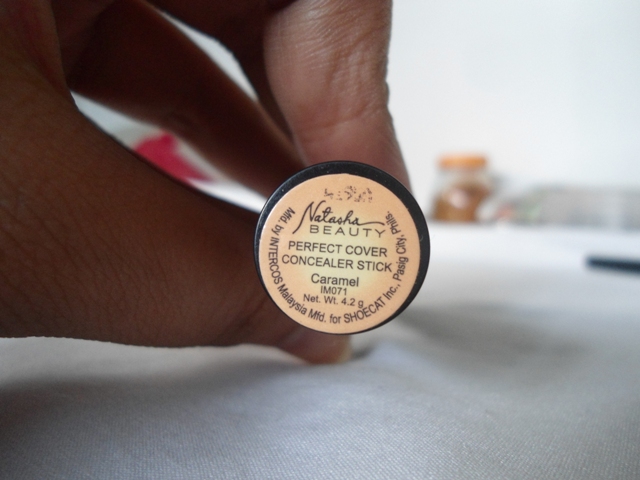
This one is my cooler month concealer: Natasha Beauty Perfect Cover Concealer Stick in Caramel. Whenever my CoverGirl concealer becomes too dark to my skin, I switch up to this one. It also has the yellow undertone which works well with my dark circles. At times, I blend this one with the CoverGirl concealer to make a 'summer' version of my dark circle corrector.


If you've been reading my blog, I'm sure you have chanced upon my review of Etude House Goodbye Pore Ever Primer Stick. I'm still using it to this day, but because it's about to be used up, I primarily use this as eye primer.


Eyes

Most of the products in this pencil case are, well, eye pencils and some other items for the eyes. Because while I may be playing safe with my eyes, I spruce it up once in a while by wearing eye liner.


I have here Natasha Beauty Day-to-Night Eyeliner in Purple Wine and Emerald Green. I think these colors are ideal for me because jewel-toned colors highlight my eyes. I just keep the rest of my face (cheeks and lips) neutral so that the purple- or green-lined eyes stands out.


These are Natasha Beauty GlamFix Eyeliners in Chocofix and Pearldrop. As you could notice, I have a lot of brown eye makeup, as this is my 'default' eye makeup color of choice. I stay away from black as it is too strong for my eyes -- not to mention looking too 'emo.' There's a little trick I learned using white eyeliner -- apply some at the inner corner of the eyes to achieve the 'wide awake' look.


But while I may be staying away from black in terms of eye makeup, this one is an exception: Avon Simply Pretty Metallic Eyeliner in Black. It allows me to go from natural (plain tightline) to bold (cat eye) without much fuss. Not to mention it's long lasting.


In a crowd of eye makeup, this one is a standout -- this is a makeup trio from Avon that comes with eye (shimmery brown), lip (red) and cheek (peach) color in cream formulation. Since the cheek makeup is already used up, I use this trio for my eyes and especially the lips. This is my instant red lipstick that I could apply either with a brush or with my pinkie finger.


If I want to do more with my eyes, I just take out my Natasha Eyeshadow Trio and this one: Sketches Graffiti Eyeshadow Duo in Hazel Touch. Yes, it's brown again, but with more color depth than the trio one, so it gives me more color variety when I need it.

So there you have it -- the contents of my pencil case kikay kit. For the final part of this series, I'll introduce to you to the essential tools in my primp-up process, plus the newcomer in my makeup arsenal. See you soon!

Tuesday, December 25, 2012

Jesselle the Makeup Junkie: On Kikay Kit #1


What I like about my kikay kit #1 is that it houses all my essentials, be it makeup or otherwise. Aside from primp-up items, it also contains things like alcohol, perfume, lotion, some medicine, among others.

Now for the pretty stuff:


Face

I have here three different items for the face. On an ordinary day, I use two; on a lazy day I use one; on a very special day I use all of these. But aside from not having much time to fix myself at home, I always determine my 'mood' once I step out of the house; so as I have mentioned in my earlier post, I carry many makeup items in my bag.


I've always been partial to BB creams --  I mean, come on, who does not want an all-in-one product at your disposal, right? But truth be told, I was hesitant at first, because BB creams used to come in only one shade. However, I learned later on that 1) most BB creams blend with any skin tone when applied properly, and 2) it must be applied in five dots (forehead, both cheeks, chin and nose) so that it blends well.

Here above is my current BB cream -- Etude House Shini Star BB Cream. What I like in this one is that 1) it's completely blendable, 2) it's totally compact and 3) it's budget friendly!


This one is actually a foundation but I use this as a concealer. This is CoverGirl Aqua Smoothers Compact Foundation in Soft Honey -- my exact shade that's perfect for covering up pimple marks and blending out dark circles. I like that the formulation is pigment-rich without being too heavy-looking (in short: buildable) and, well, it blends well with my skin tone. However, on days that I need to brighten up my eyes, I put on a concealer in a shade lighter than this one, and I have it on my other kikay kit.


Spoiler: you'll be seeing a lot of Natasha Beauty and Sketches makeup in my kits. You see, my mom is a Natasha dealer, and I grabbed the chance to smuggle get some makeup items from her. Case in point: Sketches Shine-Free Blemish Control Pressed Powder. And this one is one proof that cheap doesn't necessarily mean cheap -- it takes out shine and will take you quite some time before your next touch up. A useful tip: use a powder brush to buff it all over your face (thus the reason for the absence of the requisite powder puff in this compact)

Eyes and Cheeks

I always play safe with my eyes. Probably the most daring that I've done is to a smokey eye using both a black-gray palette and a brown palette, but on separate occasions. For the most part, I use only one or two shades of eyeshadows at a time. When I feel lazy, I only fill out my brows with powder, set it with clear mascara and wiggle some black mascara onto my lashes (lash curling included). And when I feel uber lazy (read: tinatamad) I scrap the whole eye makeup thingy altogether, and I go by with BB cream, powder, clear mascara on my brows, blush and lipstick.

The same goes for my cheeks -- I only go for peach or coral-shaded blushes. Go any further than that, and I'll look like a traditional Korean bride (you know, the one that puts on two red dots on her cheeks?). Exception: cheek tints -- any shade will do for me, so long as I blend it very well and pat on powder afterwards so that it imparts a natural look.


This Natasha Eyeshadow Trio in Beachrush is my go-to eyeshadow set, simply because it is in a shade that matches my skintone. As you can see in the second photo, the middle shade (shimmery beige) has been used up, since I use this shade most of the time -- a few swipes is all I need. The left shade (chocolate brown) is used for a bit of eye contouring and also serves as my pseudo-eyeliner (pseudo because I swipe it on the area near my lash line and it looks like I wore a light eyeliner).


Another Natasha product right here: Natasha Beauty Lash Specialist Mascara. And another cheap-but-not-cheap product here: it uses a rubber wand, the same ones used in some high-end mascaras. That's the thing I love in this mascara, as it allows me to apply it on without much clumping; although on clumsy days when I apply too much of it, I separate my lashes with a clean spoolie.


If I'm asked to put only five makeup items in my kit, this is one of those I'll include: Sketches Clear Mascara. I primarily use this to set my brows in place (thus the reason for the 'browning' of the product -- I apply this one after filling out my brows with brow powder) but I also use this as my lazy-day mascara.

OOT: Mommies, if you wanna teach your girls makeup basics but don't want the full-on makeup thingy (some schools prohibit them), this one is perfect. And I personally think that brow grooming must be one of the first 'makeup tips' that should be taught to young girls. Brow threading is optional here, but teaching them how to comb those brows and setting them in place with clear mascara is mandatory.


This blush (Natasha Beauty SecondSkin Blush in CoralCruise) is a personal favorite of mine because of its color. Because it's so all-around, this is one product that I could not go by without in my makeup bag. (Additional tip: after putting on powder blush, swirl a clean powder brush on your cheeks to buff out excess powder. When using a cream or liquid-tint blush, pat on some powder to avoid looking too severe.)


Lips

I actually feel bold enough to play up with my lips -- after all, if you feel awful with one lip color shade, then wipe it off and replace with another one. Because of that, it's also the best way to change looks in a single day: gloss by day, red lips by night; nude by day, plum by night... you get the picture.


The first lipstick is what Liz of Project Vanity calls the MLBB (my lips but better) color -- Natasha Beauty Color Spalipstick in Coco Haven. My lips are in a plum-brown shade, and the lip color is in that shade, but what I like the most is the creamy finish -- it's like lip balm, only heavily tinted. Actually, I'm partial to cream-finish lipsticks ever since my first self-purchased lipsticks...


Which leads us to the second and third lip shades: Maybelline Moisture Extreme Lipstick in Coral Pink and Buff. Today, this kind of lipstick has three case colors which indicates the shade's color family (pink, golden orange, red, brown), but when Moisture Extreme first came out in RP market, it is encased in a red case, just like this one (napaghahalata ang age ng lipstick! hahaha!).

Anyway, Coral Pink is my pink-but-not-too-pink lipstick -- it's actually a peach-pink one which looks a little light when applied to my lips, but actually looks like... my skin when I put on my blush (see above). On the other hand, Buff is my nude colored lip color. When I want a no-makeup look, this is what I reach my hands for.


This one is my 'pink' lipstick: Natasha Beauty Lush Lips Lipstick in Goddess. This is the lightest lip color in my kit, goes on creamy but has a sheer finish. The sheer finish is the reason why I still have it in my kit despite its light color -- when I want a polished or 'pa-sweet' look, this is what I apply.


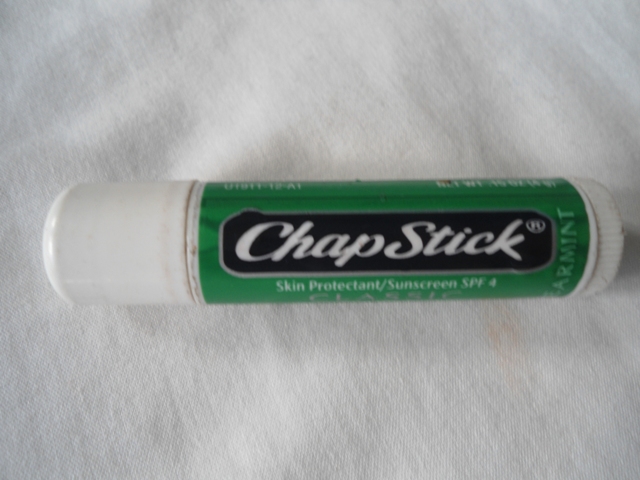
I'm a huge fan of ChapStick. In fact, back in high school, my makeup only consists of Johnson's baby powder and ChapStick. My favorite variant is strawberry, but I'm currently using the spearmint variant. It was my brother who introduced me to the variant -- he let me borrow his spearmint ChapStick when mine went missing. I eventually found mine, and I let it finish off before buying my own spearmint ChapStick.


Bonus item:


I've mentioned this item once in this post, and I think it's worth mentioning since, after all, it's included in my kikay kit: my Fanny Serrano Lash Curler (see the print on the second photo?). As I've mentioned, I rarely put on anything on my eyes, but I think it works wonders in making my eyes seems awake even after pulling off an all-nighter. *wink wink!*

.
.
.
.

So that ends my post of the day. Sorry for the long post, 'cause there really are lot of things in my kikay kit. 'Till next post!